Let’s say you’re given the task of setting up a bunch of thin clients connecting to a Linux server for non tech-savvy users. These users just need access to the Gnome environment, email, web browsing, etc. You need something easy, reliable, and most of all secure.
Unless you’re on a wired network that you 100% trust, you probably shouldn’t use XDMCP as your traffic is not encrypted. Plus, XDMCP requires setting up port forwarding or opening ports. But there is a way to secure your traffic and circumvent the need for port forwarding using Secure XDMCP. The only requirement server side is that SSH service is running. Let’s go over the steps of setting up Secure XDMCP.
First, you need to make sure the SSH server on the remote host has X11 Forwarding enabled as such:
| SSH Server | Config file | Setup |
| OpenSSH | /etc/ssh/sshd_config | X11Forwarding yes |
| SSH.COM | /etc/ssh2/sshd2_config | AllowX11Forwarding yes |
Step 1. Creating a Secure XDMCP session
- Start Xbrowser
- Right click on a session icon and select Save as SSH connection
If the destination remote host and SSH server are not in the same machine, do the following:
- Right click on the Secure XDMCP session and open Properties.

- Click the Setup button next to the method field to see the following window:

- Check “The SSH Server host is different from the XDMCP server” box to enable the Host field.
- Enter the IP addres/domain of the SSH Server.
- Enter the user information in the User Authentication fields.
- Click OK to save your changes
Note: If SSH server and XDM are in different servers, GatewayPorts must be set to yes in the SSH server.
Step 2. Connecting with Secure XDMCP
- Open Xbrowser.
- Double click on the Secure XDMCP session.
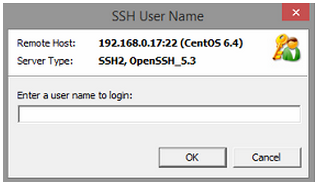
- Enter the user name in the SSH User Name dialog box.
- Select an authentication method and enter the appropriate information.
- Click OK and your remote login screen will appear on Xmanager.

 한국어
한국어