What is Gitlab?
Gitlab is respository manager developed by Gitlab, Inc. Gitlab provides easy access control, code reviews, issue tracking, activity feeds, wiki, and continuous integration. Tens of thousands of organizations currently use Gitlab to manage their repositories.
Compared to other SaaS (github, bitbucket), Gitlab allows you to host the repos on your own servers. This is crucial when you need to manage git while access to an external network environment is restricted. Most importantly, Gitlab becomes a means of implementing a Central Management System.
This article will guide you through installing Gitlab and getting it up and running.
Installation
In this guide we will install Gitlab on CentOS(Version 7.1). If there any changes to the installation process, you can find them here: https://about.gitlab.com/downloads/#centos7
- Install the necessary dependencies for CentOS. You’ll need the following commands:
Note: In the picture below “> /dev/null” is not necessary. It simply means that the command’s output will be flushed
sudo yum install curl policycoreutils openssh-server openssh-clients

sudo systemctl enable sshd

sudo systemctl start sshd

sudo yum install postfix

sudo systemctl enable postfix

sudo systemctl start postfix

sudo firewall-cmd --permanent --add-service=http

sudo systemctl reload firewalld

- Add the Gitlab package server and install the package
curl -sS https://packages.gitlab.com/install/repositories/gitlab/gitlab-ce/script.rpm.sh | sudo bash

sudo yum install gitlab-ce - Configure Gitlab
sudo gitlab-ctl reconfigure- It is recommended to use a domain that has the external_url’s value of the /etc/gitlab/gitlab.rb file registered in the domain’s DNS.
- For other settings details please visit: https://gitlab.com/gitlab-org/omnibus-gitlab/blob/master/doc/settings/configuration.md
Installation is now complete! Now lets access Gitlab via our web browser.
Administrator Settings
- First thing you’ll want to do is access the console and change the root (administrator) password
// Execute gitlab console

gitlab-rails console production

// search admin user

user = User.where(id: 1).first

or

user = User.find_by(email: 'admin@local.host')

// change password user

user.password = 'password_to_change'

user.password_confirmation = 'password_to_change'

//save changes

user.save!

- Login using your credentials and access the Admin Area.

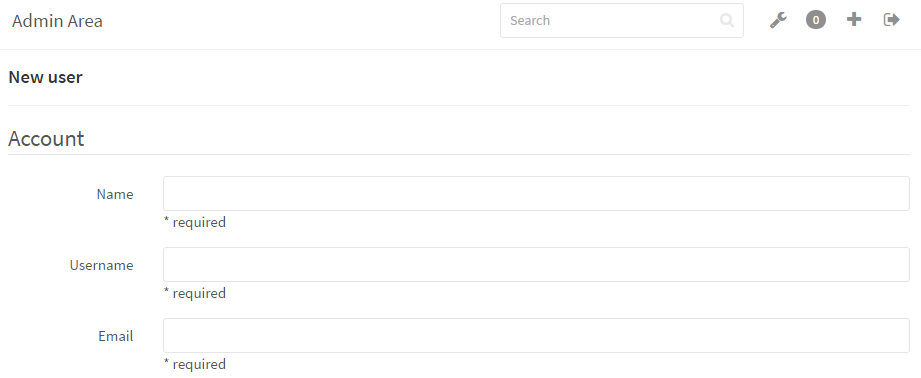
- We recommend you adjust Sign-in Restrictions and disable “Sign-up enabled”. Also, make any desired changes to Access Control.You can manually add and invite new users through email in the Admin Area -> Users -> New User section.

First Look and Creating a New Project
This is your control panel:

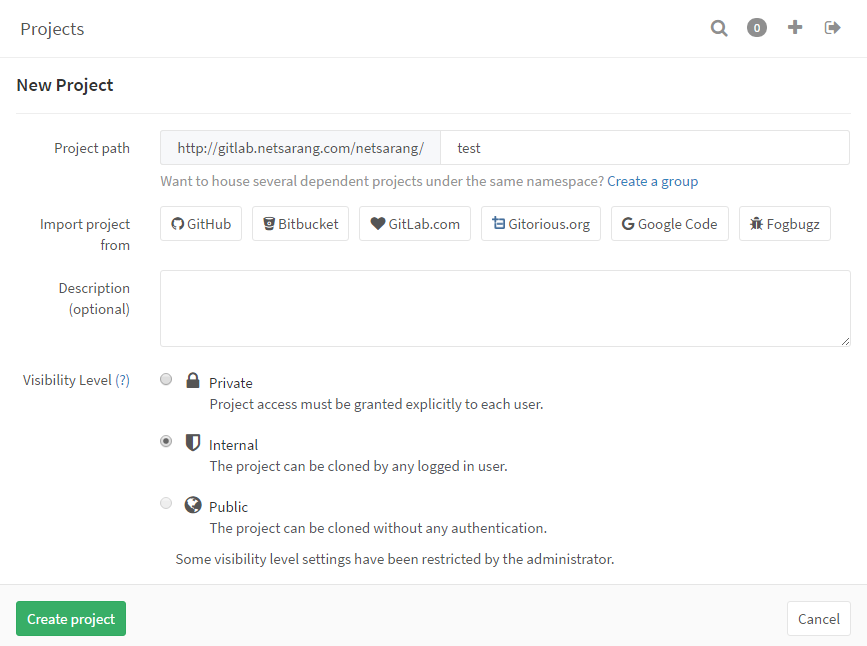
Go to Projects and click New Project to create a project. Create a project from scratch or import an existing one. Don’t forget to set your visibility levels depending on your requirements.
Your local centralized git repository management system is functional!
Test Connection using HTTP
Now we’ll test a connection using TortoiseGit. If your system does not have Git or TortoiseGit you can download them from their respective official websites:
Git url: https://git-scm.com/
Tortoisegit url: https://tortoisegit.org/
To follow this tutorial, you must select Openssh Client when installing TortoiseGit. We recommend rebooting your client machine after installing Git and TortoiseGit.
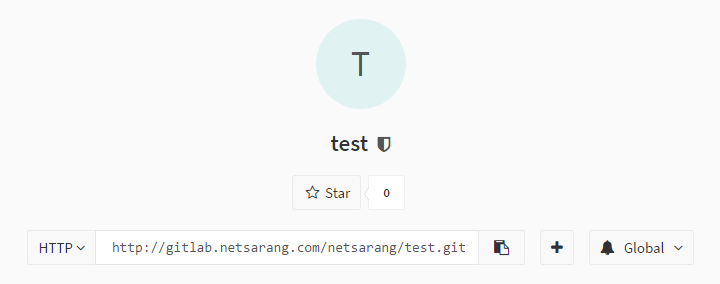
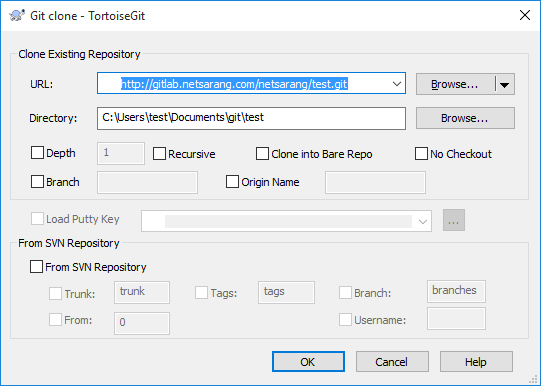
- Access Gitlab’s project page. Set to HTTP and copy the repository URL
- Choose the directory to which you’d like to clone the repository. Navigate to your desired directory on the client machine, right click, and select “Git Clone.”
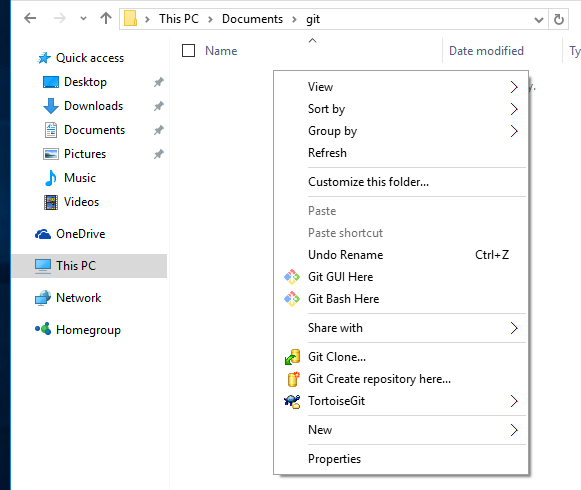
- You’ll see the following dialog box with the URL automatically filled in. Click OK to begin the cloning process.
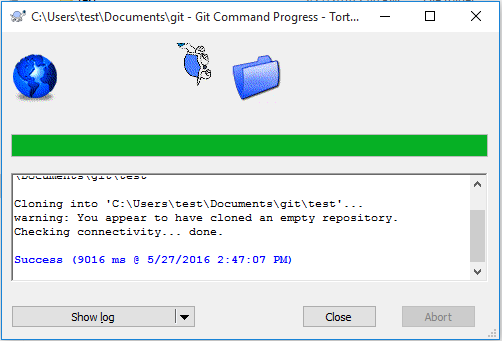
- You may be prompted for your authentication credentials. Success!
In our next post, we’ll introduce how to connect to the Git server using Xshell with SSH and TortoiseGit.

 한국어
한국어